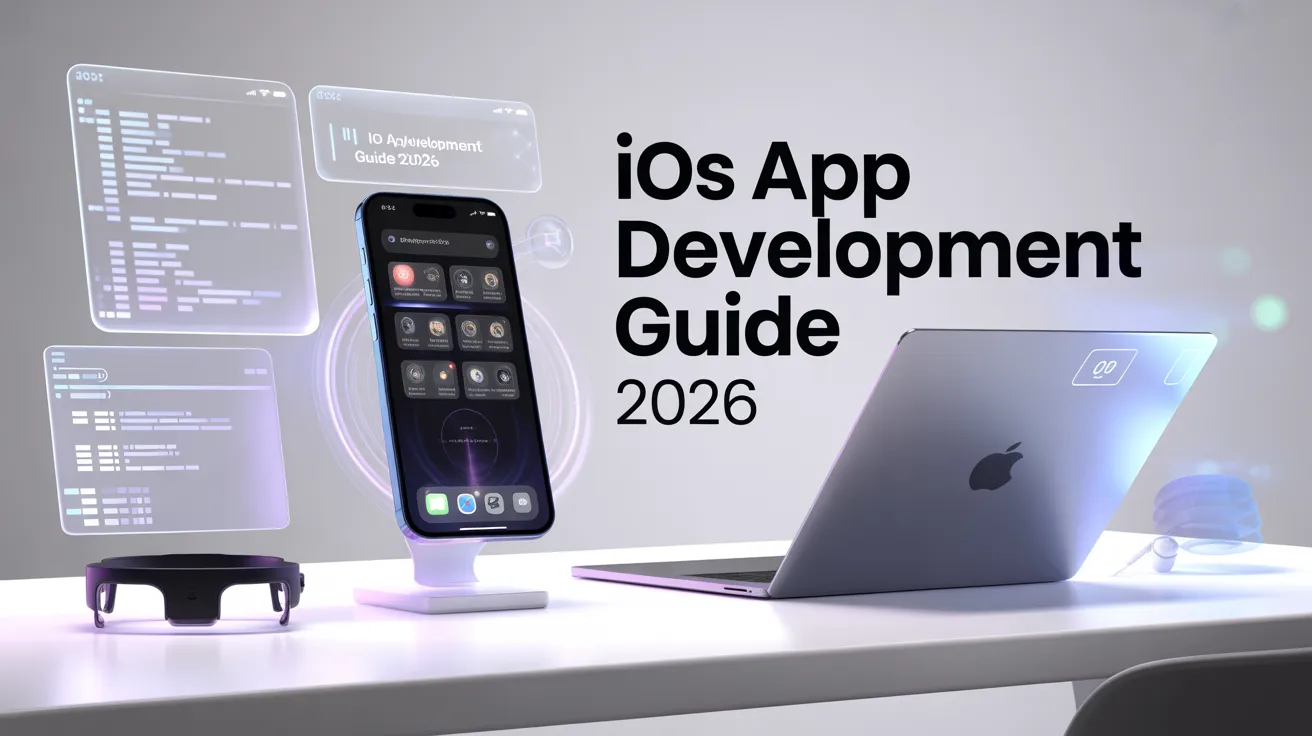
Learn the complete iOS app development process, requirements, tools, programming languages, and deployment steps needed to build, test, and launch successful iOS applications on Apple devices.
-
 Understand iOS app development basics, requirements, and tools like Xcode and Mac system.
-
Learn programming languages such as Swift and Objective-C for building iOS apps.
-
Explore the complete development process including coding, testing, and App Store deployment.

If you’re planning an iOS app in 2026, you’re probably not confused about what you want to build. The confusion usually starts around how it should be built, what choices matter, and where teams tend to misjudge effort, cost, or timelines.
Most guides skip that part. They talk about tools, frameworks, and features, but avoid explaining how iOS apps are actually planned, built, maintained, and corrected after launch.
This iOS app development guide is written to close that gap. Not from theory, but from how real iOS products are shaped today, especially when the app is tied to revenue, operations, or customer experience.
Table of Contents
Why iOS App Development Still Makes Sense in 2026
Let’s start with a simple observation.
Despite new platforms and shortcuts entering the market every year, serious products still invest in iPhone application development first.
The reason isn’t brand loyalty. It’s predictability.
iOS devices update faster than any other mobile ecosystem. User behavior is more consistent. Design rules don’t change dramatically overnight. For businesses, that stability matters. It means fewer surprises after launch and fewer edge cases to handle later.
Another factor that still holds strong is user quality. iOS users, on average, engage more, spend more, and abandon apps less often. That’s why teams building paid products, subscription platforms, or apps handling sensitive data still treat mobile iOS app development as a primary channel, not a secondary one.
Once this value is understood, the next question usually follows quickly:
“If iOS still makes sense, what’s actually different now compared to a few years ago?”
What Has Changed in iOS App Development Over the Last Few Years
The biggest mistake teams make is assuming iOS development today looks the same as it did earlier. It doesn’t.
Apple has tightened expectations across the board — privacy, performance, permission handling, and long-term maintenance. Apps are reviewed not just for how they work on day one, but how they behave after updates, across devices, and under real user conditions.
Swift has matured into a stable language that supports cleaner code and fewer workarounds. Frameworks have become more opinionated, which reduces chaos but demands better planning. App Store reviews have become stricter around data usage and user transparency.
In plain terms, iOS applications development now rewards teams who think ahead and penalize those who rush.
This is why understanding the modern development process matters before choosing tools or partners.
What is iOS App Development?
iOS App Development is an operation to build mobile applications for Apple hardware such as iPhone, iPad, and iPod Touch. The software came into existence only with the usage of Swift Programming language or Objective-C. Afterward, deploy it in the App Store so people can easily download it.
If you are a mobile app developer then you may already have reservations to do iOS app development. For instance, each developer needs to have a Mac Computer and Macs are generally more expensive than Windows-based computers. Furthermore, when you finish with your app, it passes by under a rigorous quality review process before getting featured in the app store.
In case you are surrounded by tens of thousands of people who are users of iPhone and iPad, it is good enough to be a reason to enter the arena of iOS App Development. Though there are indeed many barriers present to go with it. However, iOS app development is a lot easier than Android app development.
Also Read :Guide to Develop iOS App On Window PC
Basic Demands to Go for iOS App Development
Before we take a deep dive into the sea of iOS App Development, let’s understand what are the general requirements present. It is necessary to fulfill these to take the usage of programming languages like Swift and Objective-C to create iOS-based applications.
1. Availability of Mac System for iOS App development
To receive an answer to the query on how to build an iOS app, begin your work with the current version of XCode. For this, you need to have a Mac computer that is equipped with an Intel processor running on the latest version of Mac OS version.
To entertain this condition, you can get yourself a Mac mini. After purchasing it, attach it to your screen and you are good to go further. Some of the specifications of the Mac mini are a 3.0 GHz core i5 processor and 8 GB Memory.
The better the configuration your hardware has, the better the iOS app development will take place. Now, that you already have an understanding of the Mac system, it is time for you to register yourself for an Application Developer account.
2. Do register for an account with an application developer
Registering for an Apple Application developer account is free of cost. It is mandatory to perform this as only after this, you’ll receive the permission to download Xcode and gain access to iOS SDK. You will get reach to the development videos along with needed technical resources.
Consequently, the moment to register at the Apple Developer’s website rings the bell. In case of any confusion, make your way to the Apple official website or iOS platform to have the step-by-step guide for the same. The only thing you need to do is to form an Apple ID and fill in all the required fields with accurate information in your profile.
Now, jump on the procedure to set up XCode by executing the steps highlighted below one by one.
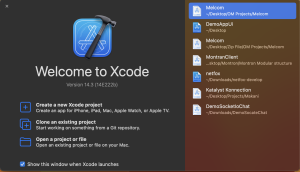
3. Installation of XCode
There is only one tool that you may need in the beginning to start the process of iOS app development i.e., XCode. It is Apple’s Integrated Development Environment (IDE) for iOS and Mac apps.
To build the iOS application, you will need to take the graphical interface of XCode to perform flawless iOS programming. XCode consists of a plethora of frameworks, compilers, tools, and iOS SDK. The need for all this will emerge to entertain the matter of designing an engaging user interface, software development, and debugging.
It is good to know what is XCode but only great once you get acquainted with the procedure to install XCode.
- Launch the Mac App Store. It is located in the dock only if you are using the latest version of Mac OS. In contrast, if you fail to spot it, proceed to upgrade your Mac OS to the newest version.
- Type “XCode” in the Mac app store and tap on the free button to get it downloaded on your device.
- As soon as the download process ends, you can see the folder of XCode on the launchpad.
That’s it, now you should open the XCode to move forward for iOS App Development.
Languages in stock for iOS App Development
Everyone has the right and have to pick one language to go ahead with the task of iOS app development. There are more than 10 languages for mobile app development but if you going forward to iOS app development then There are two alternatives available for language so know about those by looking below:
-
Objective-C
Came into existence in the early 1980s, objective-C was the primary language for all Apple products in the first place from earlier times. Scraping its foundation from C language, Objective C is an object-oriented language focusing primarily on passing messages to different processes. This feature is contradictory with invoking a process in traditional C language. Most of the developers prefer to stick to Objective-C programming language to write the programming of their applications. They don’t want to shift on the Swift framework which was later devised back in 2014.
-
Swift
The Swift programming language is the new trend and is considered a new “official language” for iOS App Development. It shows many similarities with the traditional Objective-C language. But Swift is mainly based on security concerns and designed in a way to use simpler syntax than the previous one. It permits you to incorporate the code that you had written in Objective-C.
Swift is very easy to use and learn even for those who just stepped into the realm of iOS app development. It is more secure, faster, and more promising for building an iOS app. You should prefer Swift for developing an iOS app rather than Objective-C unless you have a valid or strong reason to stick to that traditional language.
Procedure To Do First iOS App Development From The Very Beginning
After satisfying all the prerequisites for iOS app development and the selection of the language, it’s time to go for forming an app. Here are the steps laid down descriptively to make an application for iOS. Please take a look and build your first app seamlessly.
Setting up of Development Environment by opening up Xcode

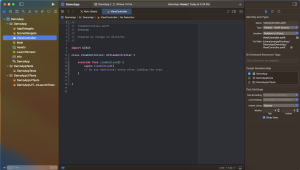
To create an iOS app, entertain the need to set up your development environment. The beginning of this occurs after placing hands over the essential tools. And the foremost tool for iPhone app development is XCode, Apple’s official Integrated Development Environment (IDE). Download it directly without any restrictions from the Mac App Store. Once installed, spend some time on it to get familiarized with the interface and functionality. It will help you as you need to use it mostly for iOS App Development.
Forming up the first new iOS App
Click on the XCode and launch the app. Then, mark your presence at the option of creating a new XCode project and tap on it to start with iOS app development.
Selection of the platform to devise the first app
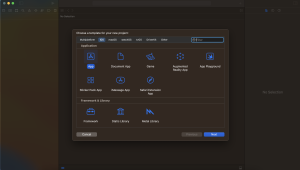
Choose the single view app option as a type of project and select next to move further. It will let you have one view controller and storyboard that is open for customization so make it as you want later.
Picking up the team along with the project name
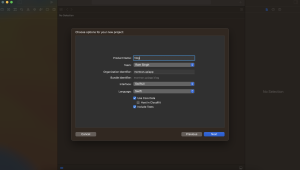
It is the time to choose a name for your new project. Do select Team None for now. Tap to choose Swift as a language to start the programming. Click on next and you can witness your empty app with no functionality.
Note: One has two languages as the alternative for iOS app development: Swift and Objective-C. Swift is a new language and easy to use offered by Apple that has gained so much popularity in less time.
Customization of the Main Interface of the application
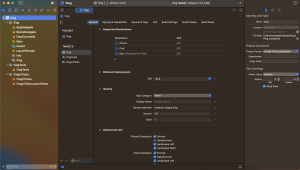
After waiting for some time, you will receive the right to alter your app as per your choice. Inside the XCode, you can reach a file or folder with the help of the code editor’s left panel. On the other hand, the right panel of the code editor is called the Utility Area. It will help you in dealing with views or any other element of the storyboard.
Eradicating bugs by reaching at Debug Areas
Spot the run and stop button located at the top of the toolbar. In contrast, at the bottom of the code area, see the debug/console area along with the presence of breakpoint and other runtime tools.
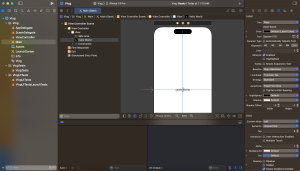
Incorporation of Labels and Elements
Now, explore for the main. storyboard located in the project directory by tapping on it. The storyboard is a file designed to build the interface to showcase and layout all the elements like buttons, labels, tabs, lists, and navigation bars. In the beginning, you will witness a blank view. Make the selection of the view by tapping on it.
In the case of XCode 10 or above, to add an element like the label, tap on the view menu present inside the menu bar and then drag that label to the segment of focused view. If you have an older version of XCode, you can locate the Object Library situated in the bottom right part of XCode. Now, double-click on the label you have saved in the view and change the text with your app name.
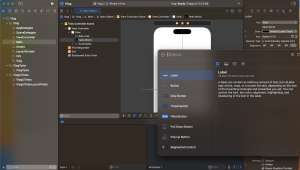
Perform Coding and functionality with Swift
An app is nothing just by its appearance but it needs functionality as well to be termed as an app. This is the moment when Swift’s programming language enters into the game.swift is a programming language powered by Apple for iOS App Development. Within XCode only, you can find Swift files analogous to your various parts of the app. Here, mention the code to execute the activity when a user interacts with one of the elements of your app that you placed in your storyboard.
It is necessary to perform the coding in the View Controller. swift file. Furthermore, the option to check other files is always open for you. The main. storyboard file is a UI or thing that appears to a user. Let’s now focus completely on programming.
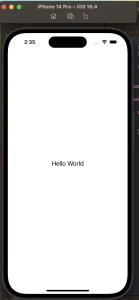
- Open “ViewController.Swift”.
- Inside “ViewController.Swift”, define the outlet of the label and assign the text whatever you want. Here, we are using “Hello World”.
Throw your iOS app on testing on a particular device
XCode provides a stimulator with the feature of acting identical to the behavior of several iOS devices. It enables you to witness how your app would run or perform on an actual iPad or iPhone. In this whole scenario, you don’t need to have an actual iOS-based device. However, it is always better to test the app on an actual device to prevent any discrepancy.
Deploying the app to the app store for users
Once you are satisfied with the testing and regarding your app’s performance based on functionality and interface, you can start thinking about deploying it. Before proceeding with the submission of the app to the app store, ensure that you satisfy all the guidelines of Apple. Prepare a great listing entry for your app by enthralling screenshots, captivating descriptions, and any other required metadata that will help. After submission, Apple runs down its inspection and examines the app thoroughly to see whether it fulfills all its guidelines or not. If it passes the examination, it will be deployed on the app store.
This is the step-by-step guide that will enable you to create an app under iOS app development. If you face any issue in between the procedures, Orangemantra is reachable every time for all of you. Our experts in iOS app development will assist you in tackling the trouble you are facing.
Tips to get your iOS approved by Apple
At the time of submission of the app, take the aid of these tips and ensure to follow these to get your app approved by Apple in the first go.
- The most crucial thing is Apple’s guidelines. It is like rules written in a constitution so adhere to them strictly without distorting from any.
- It is smart to create a basic version or beta version of your app and then infuse the modifications based on the testing and feedback that you receive.
- To put rejection miles away from your app, strive hard to form something unique that no one has ever made. Built it with features that no other app consists of.
- If you want your app to get passed through the review process successfully, ensure that the description you put must be completed, accurate, precise, and relevant.
- Launching app testing is a great way to check whether your app is working properly or not. You can inspect with the help of Apple’s TestFlight service. Check if it is working flawlessly on iOS-based devices or not. It is an ideal way to eradicate all the errors or bugs that exist.
- Don’t go with the submission of the app that is still stuck in the phase of iOS App development or considered a beta version.
- When it comes to creating a new app, it is necessary to become innovative in involving features in an app. Besides this, you must be aware of the general iOS app development trends of your niche. It will ensure the success of your app and inform you that it reaches your target audience smoothly.
- A streamlined procedure is a must in iOS app development. Verify that you have all the required information like an Apple developer account and a computer running with OS X. Moreover, check for the availability of XCode and Keychain access on your device. Ultimately, in the end, confirm twice whether your app is adhering to all the guidelines of Apple or not.
iOS App Development: A subset of Mobile App Development
Mobile App Development can be described as a process of creating software applications that usually work on mobile devices. There are only two dominant platforms present in the modern smartphone market. One of them is the iOS platform devised by Apple Inc. The second one is Android introduced by Google. These two platforms indeed have various similarities but they demand different development kits and toolchains. Besides these two, some other alternatives for building mobile apps development are:
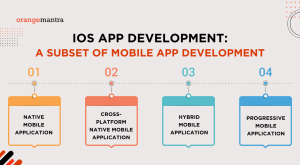
- Native Mobile Application
- Cross-platform Native Mobile Application
- Hybrid Mobile Application
- Progressive Mobile Application
But, in this guide, we only talked about iOS App Development. Therefore, to know more about mobile app development or iOS vs Android, check out this blog of ours.
Bottom Line!
It is too exciting and incredible to even think of building the first app from the very base. It is not the result that brings forth a difference but the process of making, altering, and learning. With this whole procedure, you will find in the end that you are adroitly equipped with the techniques involved in iOS App Development.
Moreover, if you find yourself on a path loaded with trouble or obstacles to learning iOS App development, Orangemantra always has your back. Our team full of professionals will assist you in building your first iOS app from scratch. Attain aid in the hour of the need just by reaching out to us.
FAQs (Frequently Asked Questions)
- What coding languages are used for iOS app development?
A simple, secure, and impressive programming language called Swift is used for iPhone apps, iPad apps, iOS, watchOS, and tvOS apps.
- Is it tough to learn iOS app development?
With the Swift programming language, Apple has enhanced the tools and made all the syntax simple so people can easily use it. All you need to create your first app is a Mac with XCode installed in it along with some mandatory resources. So, it becomes straightforward to learn iOS app development.
- What is the procedure for publishing an iOS app on the app store?
If you want your app to get approved on the first attempt of submitting it, disclose all the information Apple wanted at the time of submission. Click some screenshots, provide clear and crisp descriptions, and make sure that there exist no flaws or errors in your design and functionality of the app.
4.What are iOS simulators?
iOS simulator is basically imitation through which we can virtually run app iOS or iPhone without having phone
About the Author


Related Articles